Placing advertisements on your website


There’s no denying advertising is everywhere and a huge part of our lives. Especially in today’s digital age, businesses can more easily find and target their ideal customers to make them aware of their services or goods. As a community, you likely have several members searching for reputable businesses to help with home repairs, landscaping, or even a great place to eat nearby.
Therefore, you can take advantage of the need for local businesses and service providers to advertise online by placing their advertisements on your community’s website! You can charge them a fee or negotiate an exchange of service or goods for placing those ads directly on the website. Now, that’s a win-win! Below, we're sharing 4 different ways you can approach placing those advertisements on your website.
Rotating photos
The first option for placing advertisements on your website is to add them to your homepage’s rotating photos. The rotating photos are incredibly impactful because your homepage is always visible to the public. This means not only will your members be able to view those advertisements, but any other visitors that come across your website can also be influenced by what is being advertised!
The images you add to the rotating photos will automatically rotate through, as shown in the visual example below. To draw members' eyes down the page to view your rotating photos, we recommend adding advertisements in between other photos that showcase your community. For instructions on enabling this homepage setting, we recommend checking out this article: Homepage rotating photos and YOTM.
Photo gallery
Another option would be to place the advertisements on a “Photo gallery” page. You can either create a new page dedicated solely to advertisements or incorporate them into an existing photo gallery on your website!
On this page, your members can view each photo at a glance, or they can click through them all, like a slideshow. You can also add a caption to the image to include additional information about the business (e.g., hours of operation, address, contact information, etc.). We’ve shared an example below of how this could look.
General text
Next, if you’d like each advertisement displayed on its own page, we recommend using the “General text” page type for this option. When going this route, you’ll want to name the page something intriguing, such as “Preferred Vendors” or “Local Services,” to make it more likely that your members will click on it. If you’re going to be adding multiple advertisement pages, keep them organized by placing them all into a folder!
Most viewed pages
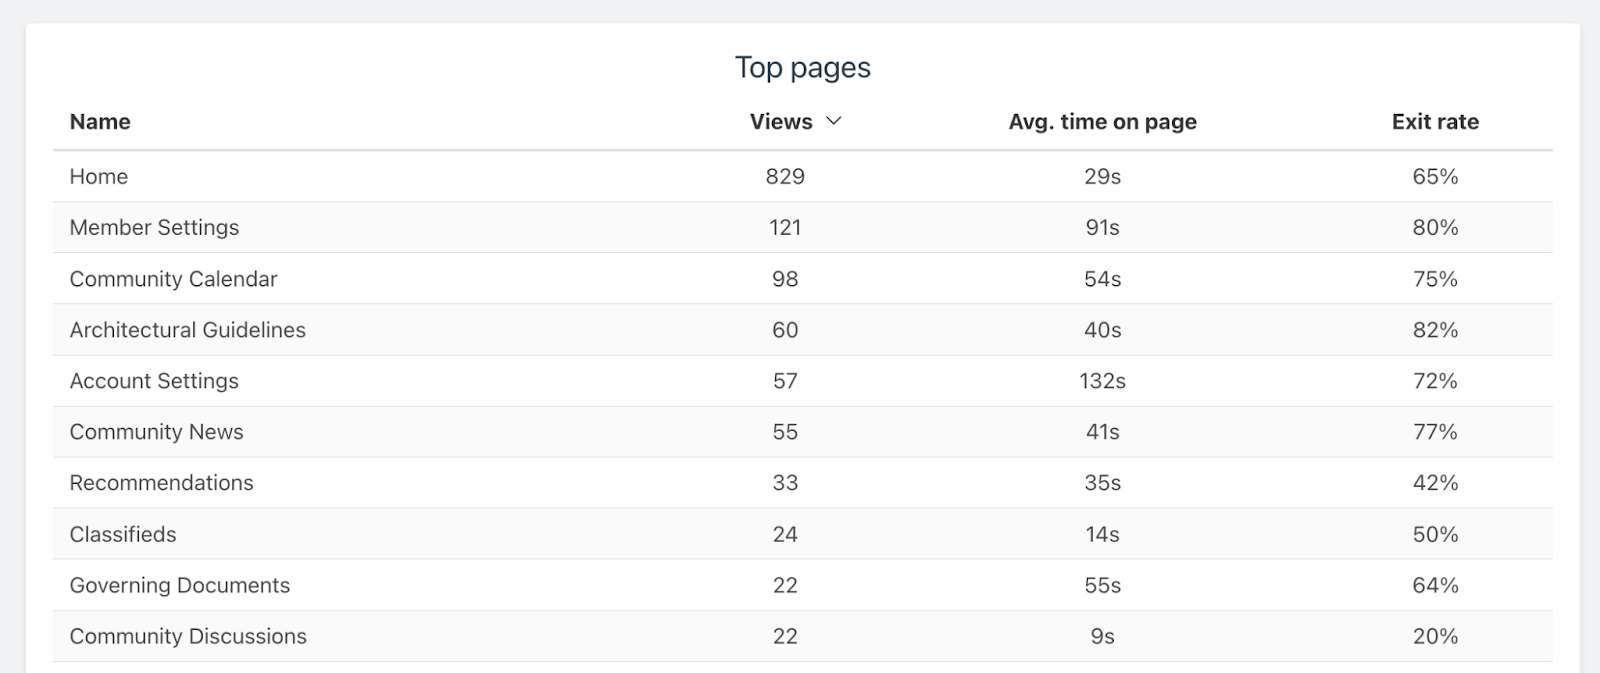
Lastly, you can place the ads in the page text at the top of certain pages. To view which pages are most frequently visited on your website, check out the “Top pages” data in the “Visitor tracking” section in your Admin Portal! This way, you’ll have a good idea of which pages will produce the best results when it comes to placing those advertisements in front of the most eyes.
In the example provided below, this website would benefit by adding advertisements to some of the pages included in this list, as those have been the most frequently viewed pages by their website visitors!
Wrapping up
While you may be under the impression that advertisements on a website are intrusive or annoying, they don’t have to be! By taking a practical, organized approach to adding advertisements to your website using the above best practices, you can ensure that your members reap the benefits of having an easy way to find valuable business information right at their fingertips!